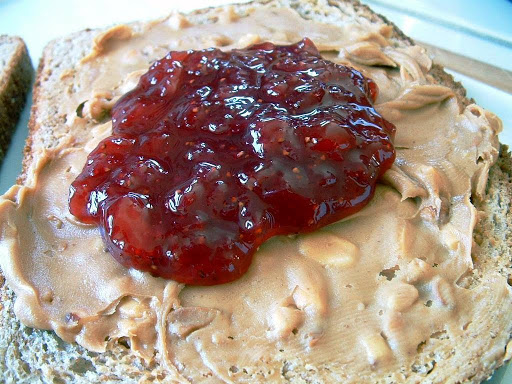
Strawberry Jam, Perfected (using no pectin)
By Foodiewife
I am a total beginner in making my own fruit jams, but this recipe is easy and pretty foolproof. You can substitute strawberries for just about any kind of jam. I use olallieberries or raspberries with great results.
A few tips:
Plan on 2 hours, from start to finish. Sterilize the jars and lids in hot, simmering water.
You will need a set of long tongs or a can lifter (look for canning supplies). Have clean cloths ready and a good set of oven mitts-- the boiled jam reaches about 217°F degrees!
Canning is not hard to do. For more info, please visit my food blog:
http://foodiewife-kitchen.blogspot.com/2009/06/preserving-summer-strawberry-balsamic.html
For more photos and a simple instructions on how to make this, please visit my food blog:
www.foodiewife-kitchen.blogspot.com
Ingredients
- 2 quarts fresh berries, 4 pints
- 6 cups of sugar
- 1 pat of butter
- NOTE: I get four pints of crushed strawberries out of 6 baskets of strawberries
Details
Servings 6
Preparation time 20mins
Cooking time 90mins
Adapted from foodiewife-kitchen.blogspot.com
Preparation
Step 1
If using strawberries, hull them first; then wash and then drain them.
Mash them, in layers. (I pulse them in my food processor until they are the size I prefer… small chunks, but not totally pureed).
Combine the strawberries, (or any kind of berry) with the sugar and stir until blended.
Bring to a continuous roll, stirring frequently, so it doesn’t stick.
Bring to a gel stage (approximately 10 minutes).
To test if the fruit is at the gel stage, I like to chill a plate in my freezer. Spoon a little of the cooked fruit on the cold plate. Run your finger through it, and see if it separates. Let is sit a minute more and feel the texture. If it gels, it’s ready.
Pour into sterilized clean class jars with lids.
Set the filled jars in a rack, covered by at least 2” of boiling water. Keep the pot covered and set a timer for 10 minutes, from when the water begins to rapidly boil.
Remove from the pot, carefully, with a jar lifter onto a clean towel.
Listen for the “pop” of the vacuum on the lids…and/or press a finger on the top. If it’s firm, you have a good vacuum.
If a jar is not sealed, properly, you can repeat the water bath boil method, or refrigerate this jar and eat within 2 weeks.
You'll also love
-
 Poached Salmon with Dijon Cream...
4.8/5
(5 Votes)
-
 World’s Best Tuna-Noodle...
4.7/5
(3 Votes)
-
 Red Snapper & Mango Ceviche
4.1/5
(7 Votes)
-
 Pineapple Chocolate Carrot Cake
4.5/5
(8 Votes)
-
 Slow-Cooked Ham with 5-Ingredients
4.5/5
(18 Votes)
-
 Slow Cooker Chicken and Dumplings
4.5/5
(13 Votes)
-
 Raspberry Jam Bomboloni
4.5/5
(13 Votes)
-
 Blueberry Lemon Muffins
4.5/5
(13 Votes)


Review this recipe