
Perfect Pie Crust
By SMorrissey
 1 Picture
Ingredients
- 2 1/2 cups all-purpose flour, plus extra for rolling
- 1 cup (2 sticks or 8 ounces) unsalted butter, very-cold, cut into 1/2 inch cubes
- 1 teaspoon salt
- 1 teaspoon sugar
- 6 to 8 Tbsp ice water
Details
Servings 6
Preparation time 75mins
Cooking time 75mins
Adapted from simplyrecipes.com
Preparation
Step 1
Add to Recipe Box
The big dilemma for those of us who like to cook but don't always have the time to do everything perfectly is whether to attempt to make our own pie crust or to buy a frozen store bought version. Most frozen pie tins available in supermarkets across the country bake up into something that can taste pretty industrial. Although both Trader Joe's and Whole Foods offer some pre-rolled frozen pie dough circles that will serve in a pinch.
If you do choose to make your own pie crust, there are a dozen methods out there for doing so. Every cook and every cookbook seems to have their own favorite. All butter, all shortening, vegetable oil, part butter/part shortening, lard; the list goes on.
The following are instructions for making 1) a basic butter crust (pâte brisée) for sweet and savory pies and tarts, 2) a butter crust with ground almonds replacing some of the flour for added flavor for sweet pies such as apple pie, 3) a pre-baked pie crust needed for dishes such as quiche, 4) a combination butter and shortening crust, and 5) an egg wash finish for the pie.
One of the secrets to a flaky pie crust is to work with very cold butter. Cut the butter into cubes and freeze, at least 15 minutes, best over an hour or even overnight. The minute I even think I might want to make a pie, the first thing I do is cut some butter into cubes and put it in the freezer.
Add to shopping list
Combine flour, salt, and sugar in a food processor; pulse to mix. Add butter and pulse 6 to 8 times, until mixture resembles coarse meal, with pea size pieces of butter. Add ice water 1 Tbsp at a time, pulsing until mixture just begins to clump together. If you pinch some of the crumbly dough and it holds together, it's ready. If the dough doesn't hold together, add a little more water and pulse again. Note that too much water will make the crust tough.
Remove dough from machine and place in a mound on a clean surface.
If you want an extra flaky crust, shmoosh the dough mixture into the table top with the heel of the palm of your hand a few times. This will help flatten the butter into layers between the flour which will help the resulting crust be flaky. You can easily skip this step if you want.
Gently shape the dough mixture into two disks. Work the dough just enough to form the disks, do not over-knead. You should be able to see little bits of butter in the dough. These small chunks of butter are what will allow the resulting crust to be flaky. Sprinkle a little flour around the disks. Wrap each disk in plastic wrap and refrigerate at least 1 hour, and up to 2 days.
Remove one crust disk from the refrigerator. Let sit at room temperature for 5-10 minutes in order to soften just enough to make rolling out a bit easier. Roll out with a rolling pin on a lightly floured surface to a 12-inch circle; about 1/8 of an inch thick. As you roll out the dough, check if the dough is sticking to the surface below. If necessary, add a few sprinkles of flour under the dough to keep the dough from sticking. Carefully place onto a 9-inch pie plate. Gently press the pie dough down so that it lines the bottom and sides of the pie plate. Use a pair of kitchen scissors to trim the dough to within 1/2 inch of the edge of the pie dish.
Add filling to the pie.
Roll out second disk of dough, as before. Gently place onto the top of the filling in the pie. Pinch top and bottom of dough rounds firmly together. Trim excess dough with kitchen shears, leaving a 3/4 inch overhang. Fold the edge of the top piece of dough over and under the edge of the bottom piece of dough, pressing together. Flute edges using thumb and forefinger or press with a fork. Score the top of the pie with four 2-inch long cuts, so that steam from the cooking pie can escape.
Follow directions as for the All Butter Crust Pâte Brisée, but with the above ingredients. Include the ground almonds in with the flour and the salt and sugar in step 2 above.
crust, as many custard pie recipes do, follow all the steps above until you get to the point where it says to put in the filling. Note that you will need to make only a half recipe if you are only doing a bottom crust.
Preheat your oven to 350°F. When the pie crust is sufficiently chilled, line the pie crust with parchment paper, wax paper, or aluminum foil. Fill at least two-thirds full with pie weights - dry beans, rice, or stainless-steel pie weights. Bake with weights for 20 minutes. Remove from oven, cool a few minutes and carefully remove pie weights. Poke small holes in the bottom of the pie crust with a fork and return to oven (without the weights) and cook for an additional 10 minutes, until the crust is golden. Cool completely before filling. You may need to tent the edges of the pie with aluminum foil when you bake your pie, to keep the edges from getting too dried out and burnt.
Combine flour, salt, and sugar in a food processor; pulse to mix. Add the butter and pulse 4 times. Add shortening in tablespoon sized chunks, and pulse 4 more times. The mixture should resemble coarse cornmeal, with butter bits no bigger than peas. Sprinkle 6 tablespoons of ice water over flour mixture. Pulse a couple times. If you pinch some of the crumbly dough and it holds together, it's ready. If the dough doesn't hold together, keep adding water, a tablespoon at a time, pulsing once after each addition, until the mixture just begins to clump together.
Remove dough from machine and place in a mound on a clean surface. Divide the dough into 2 balls and flatten each into 4 inch wide disks. Do not over-knead the dough! Dust the disks lightly with flour, wrap each in plastic, and refrigerate for at least an hour, or up to 2 days before rolling out.
works great for this) to make sure it is not sticking. You have a big enough piece of dough when you place the pie tin or pie dish upside down on the dough and the dough extends by at least 2 inches all around.
When the dough has reached the right size, gently fold it in half. Lift up the dough and place it so that the folded edge is along the center line of the pie dish. Gently unfold. Do not stretch the dough.
If you are making a double crust pie, roll out the second disk of dough. Gently place onto the top of the filling in the pie. Use a kitchen scissors to trim the overhang to an inch over. Fold the edge of the top piece of dough over and under the edge of the bottom piece of dough, pressing together. Finish the double crust by pressing against the edges of the pie with your finger tips or with a fork.
Use a sharp knife to cut vents into the top of the pie crust, so the steam has a place to escape while the pie is cooking.
Before scoring, you may want to paint the top of your crust with an egg wash (this will make a nice finish).
Beat egg yolk with cream and brush on the surface of the pie with a pastry brush.
- by Pastry Chef Shuna Fish Lydon of Eggbeater
How to Make a Lattice Top for a Pie Crust
We recently moved to a property with about a dozen fruit trees and a berry briar. I have always been a pie baker and maker of a pretty flaky pie crust (although not always the prettiest ones.) But with all this fresh fruit at hand, I decided the time had come to expand my crust-making expertise.
The best thing I've learned is this: Pie and pastry crust freezes beautifully!!!! I have found a recipe that makes four single crusts at a time. I wrap them individually and freeze them. When you need one, just move it to the fridge a day before you plan to use it. I understand the dough will stay in the freezer for six months or more. Although, mine never lasts that long.
I have a problem with this. I dont have a mixer with pulse. How do I make this without one? I really would like to make it. Thanks.
The methods described here require a food processor. You can make pie dough with a stand mixer or a pastry cutter, or even two knives, but I don't use those methods. You might try doing a search on Google for pie dough mixer and see what turns up.
I think that this recipe are delightful. Thank you for this wonderful addition to the family pie. Now we have wonderful pie crust to go with our families delightful fillings! Thanks again! Miss Me
Personally, I believe you don't need any kind of mixer at all! Just use a bowl, fork and rolling pin... it's not hard and doesn't take long. You need to get flour on your hands -- otherwise why don't you just buy the dough at the grocery?
I make this crust by hand since I don't have a mixer and it has always worked out really well
This is a great recipe! Being a celiac(intolerant to gluten) I can't buy frozen pie crusts. I make everything from scratch so I know exactly what I am eating. I just used arrowroot flour instead. I found mixing with a dough hook in a KitchenAid stand mixer best but hand kneading works well also.
I have a kitchen Aide Mixer and love it, however, I can tell you from years of experience a plain old Pastry Blender (an old tool still available today) has a handle and a 1/2 dozen little long blades, is the best and quickest way to make pie dough. Just chop it around in your flour with the butter, lard, shortening and in a minute or less you have the nice crumbs you are looking for.
Also we always add 1 to 2 tsp of cider vinegar to all of our pie doughs, it makes a really nice flakey crust.
I have just begun making my own pie crusts. I would like to know how to get the top crust nice and golden brown without being hard as a rock (I make my crust using veg. oil and water).
I starting making pastry crust since I was 12 - 52 years ago - and I love making pies. To brown top crust, brush with whole egg, beaten with a little milk. I sometimes sprinkle top crust with a tablespoon of sugar for a pretty look. Good luck.
Thanks Mary Beth for the tip on freezing pie crusts. Have you also tried freezing empanada crusts? I have this great recipe for empanada and would like to make it often with various types of filling.
When making fruit pies that leave the crust "soggy" crush about a half cup of corn flakes and sprinkle on the bottom of crust before adding the fruit. It absorbs the moisture and gives the crust a little more flavor.
I love all the pie crust recipes, and I just put a pie in the oven that used your Strawberry Rhubarb recipe. One question: have you tried using the no trans fat crisco? I've tried it twice for pie crusts, and both times the dough ended up too soft and malleable, even after refrigerating it overnight. The most disappointing part was when the top crust sort of collapsed in on the pie. Thankfully, it didn't affect the flavor at all. I'm wondering if I need to reduce the amount of shortening, but I'm afraid that will make it dry, and changing the butter/shortening ratio would lose the benefits of less saturated fat. When I was a kid I made great all-crisco pie crusts, but now I'm not having any luck. I'd love to hear your thoughts.
After many years of successful pie crusts, I too am now having problems due to the new shortening formula. I ended up calling the shortening company, using the phone number on the can, and they said they have had many customers express concerns. She even said in their own test kitchens they have noticed the difference in the performance of the shortening. She said their bakers tried adding additional water to the recipe, though I attempted this and did not have much luck.
This page has been so helpful. I used to make pie crusts frequently when I was a kid for my mom. I must say, I did a fine job. However, I moved away about 8 years ago, and probably haven't made a crust in about 10 years. I'm having Thanksgiving at my home this year for a total of 18 close relatives (first time roasting a turkey - should be interesting). I'm making three homemade pies, crust and all (even fresh pumpkin from a friend), and was a bit worried about my crust making skills. Thanks so much for the refresher course!
I'm a late-comer to this party, but I wanted to mention that those of us without electric mixers should not despair. I followed the all-butter recipe up top there in conjunction with Teresa Nielsen Hayden's "Savory Pie For The First Day of Winter" (http://nielsenhayden.com/makinglight/archives/009676.html). Mixing the butter in with my hands, and then mixing the water in with my hands, worked perfectly well. I may have used more water than the recipe calls for (6 tbsp? Really?) but the crust was flaky and light and perfect all the same.
* Freeze the butter and then grate them on a cheese grater (being careful not to smoosh the results together as you continue grating; I grated them right onto the flour and periodically mixed them in as I went)
* Place your water in the freezer until it develops a thin skin of ice on top
These worked really well for me. I'm doing it again tonight, the so-called "first day of winter" (winter solstice) to make those savory pies.
I used to make a pie crust with my mom which consisted of mixing unmeasured amounts of tenderflake lard and all purpose flour until well blended. Lastly adding milk to make a very, flakey, tender crust for either sweet or savoury pies.
Please add cooking temperature and times to the first recipe.
We don't have vegetable shortening in our country, and I don't really know what is that so i can find a replacement. Do you have any suggestions ?
Instead of a food processor or even a manual pastry blender, you can use two table knives to quickly cut the butter into the flour mixture. Hold one knife in each hand, cross them like an X with one tip at each side of the bowl, then draw the blades towards each other rapidly and across to the other side of the bowl. By doing this repeatedly while occasionally turning the bowl and mixing in the flour by stirring with the knife blades, you will generate the desired pea-sized bits of butter that will lead to a flaky pie crust.
Your butter should not have melted at all. Softened a little, yes. Melted no. If the crust isn't holding together, it sounds like you need a little more ice water added to it. Regarding the microwave, you can't brown food in a microwave. Microwave ovens cook by heating up the water molecules in food, so the effect you get is similar to poaching, or boiling. Browning requires higher heat and a dry roasting oven. So, no, as far as I know you cannot bake it in a microwave. You can defrost a frozen crust in a microwave and then bake it in a toaster oven. But baking requires the dry heat of a roasting oven or toaster oven. ~Elise
I found that a potato masher does just as well or better than a pastry blender. I was going to purchase a pastry blender at Wal-Mart but it looked so flimsy I knew it wouldn't do the job and was $3.00+. Nearby was a $1.50 potato masher so I brought it home and tried it. Its the kind with the zig zag bottom, not meshed like some. It works wonderfully !
I made the above recipe for pie crust but I made a few changes and it came out perfect. This is my first time on this site and love it already, the idea of putting the butter in the freezer I had never heard of before and I made a perfect crust using this idea. I cut portions because I only needed a single crust. 1 1/4 cup of flr.-1 stick of (Smart Balance 50/50 Butter Blend--purple box---I made a healthy version crust and it was perfect in texture and taste-it has omega 3 and no transfats.)salt was already in the Smart Balance, kept the full 1 tsp sugar-needed 3 tbs of water and 1 apple cider vinegar for flaky crust (the amount of liquid used is the tricky part). That is why you have to test the dough before adding too much liquid. Made a fresh peach pie, peaches were so sweet didn't need sugar, I made a crumb topping instead of crust, added oats for taste and crispiness. I usually make a good pie crust using my food processor to make the dough, but my crust sometimes is hit or miss in texture, the frozen butter and the pictures helped me make it perfectly...Also, a hint from me if you are making a very juicy pie, crush some saltines, non salted and put on the bottom of the crust before adding fruit, that will absorb some of the juice to help keep the bottom crust from getting mushy or crushed vanilla wafers or ginger snaps depending on flavor of your pie. You can make a pie healthy, now my hubby can and will eat the crust. He loved it.....Thank you for your suggestions, I hope mine helped someone.
Does anyone have a recipe for pie crust w/vinager in it? It's one Mom use to make and I can't find recipe
You're doing nothing wrong. Depending on the variety, apples can give off a lot of moisture and shrink when cooking. To avoid the shrinking, you can use fewer apples, or pre-cook the apples a bit before adding them to the pie dish. ~Elise
Is there any special advice for pumpkin pies? One recipe I have suggests cooking the crust for a few minutes before adding the filling, perhaps to keep the crust crispy and not too soggy? This is my first home-made pie crust and I'm nervous. Thanks for the help!!
Elise, I found that if you prepare your apples as directed with the sugar, cinnamon etc.. and then cook them for about 10 minutes in a deep fry pan, let them cool for about 25 minutes and then add them to your pie crust and bake, the top of your crust will stay nice and high and there will be no space between the apples and the top crust.
I was making Lemon Meringue pie, I baked my pie shell, and never forgot to poke holes in it; it came perfect but when I add the cooled Lemon and room temperature meringue and half hour later put it in the refridgerator. When I served it the next day, the bottom crust was soggy, what did I do wrong?
How do you use frozen fruit in pies without their becoming too watery? Additional flour or thickening agent simply makes it pasty.
Please help an Aussie wanting to make your pastry
I have perfected my pumpkin pie and want to work on making a much tastier crust. So, I want to try to make it myself. I am allergic to butter, and worry about 'crisco' (shortening) being so unhealthy. Are there alternative crusts? Such as, made with margrin? or other substitute?
I've always used shortening for pie crusts with no problem. It's key to keep your Ingredients as cold as possible until it's time to bake. A pyrex pie plate is also key for even temp. plus you can see how your crust is doing on the bottom. I use 2 1/4 C flour, 3/4 teasp salt, 3/4 C shortening and about 5 Tbsp ice water for the crust. Cut the shortening in before adding the water, and then mix in 1 Tbsp at a time of water mixing it in with a fork. I sometimes use a couple of Tbsp of lemon juice in place of some of the water. This last time I used all orange blossom water and lemon juice,(nice and cold) and it came out great. I'm not exactly sure who it was but a master pastry chef (centuries ago) use to do his work in a ice house type atmosphere to assure the flakiest pastry. So! stay cool! and don't overwork it. Good luck! Oh! I always use a hand pastry cutter. And when making a two crust pie I wrap one crust and fridge it while making the next, and then roll the cold one while the other chills. Remember keep things cold.
I was given this tip years (42yrs this week)ago at my bridal shower, use cold 7UP soda instead of water in the recipe. It makes very flaky crust!I use diet soda, doesn't make much difference when using so much butter though.
There's a dough blade? If there is, I'm unfamiliar with it. I just use the metal blade. You're basically using the food processor in place of the more traditional
dough blender
I made this pie crust on Sunday...my first time ever baking a pie. I've watched my Grandma make thousands of pies, using oil, but I wanted a more flaky, less dense crust. It turned out beautifully! I do not have a food processor, so I froze the whole stick of butter and grated it. I then mixed it into my flour mixture, which I had in a large porcelain bowl on chill in the freezer. I used 9 tbsp. of ice water...although it wasn't really forming into a ball. I put it all into a freezer bag, pushed the air out and pushed the mixture together with the heel of my hand. I let it sit overnight and rolled it out between two pieces of parchment paper. There wasn't a crumb left! I made another one on Monday! Thanks for the recipe! Now if I only had a food processor!
I just made this recipe without a mixer and just mixed it by hand, it was wonderful!! I am making a second one now.
When I poured the dough out to form the discs, the dough would barely stay together, dry clumps would fall off. Should I have used more water, or is that what I should have expected?
They should be about the same thickness. Sounds like either your oven isn't heating evenly or your pie is too close to the heating element in the oven. ~Elise
Hey, everyone who thinks they can never make homemade pie crusts because they're missing some kitchen utensils: don't despair! I'm a college student living in a tiny apartment and my mom would kill me if I ever bought a food processor, much less a rolling pin! If you don't have a food processor, roll up your sleeves and get down and dirty. Pinch the butter with your fingers and until the flour/butter mix is crumbly. Instead of balls of butter you'll have "shavings" and small clumps of it, but the end result still looks like Elise's picture above. After adding the right amount of ice water, you'll want to refrigerate the dough for a half hour (because your hands are warm; give the butter some time to solidify again before flattening it). When you take it out of the fridge, let it sit for 2-3 minutes so it's easier to roll.
I found an ingredient for pie dough in my Cook's Illustrated magazine. The ingredient is vodka! You replace 1/2 of the chillled water used in a standard pie crust with chilled vodka. You can actually use more water and vodka then you would traditionally because vodka is only 60% water. It makes working the crust as easy as working with playdough, and yet the vodka cooks off during baking, leaving an extremely flaky, tender crust. I don't know how come more pie makers don't know this one.
Thanks, Elise! My first time being responsible for the pumpkin pie at Thanksgiving was a hit, thanks to you. I used the half butter, half shortening recipe, and my crust was delicious! I don't have a food processor, but using a pastry cutter worked just fine. I also added a tiny splash of apple cider vinegar in with the ice water. Loved it!!
I'd like to make her a pie she can devour. =) Thank you.
I just made the butter shortening combination crust (my first time making my own crust). It turned out wonderful! The only problem is that it is so good that I am eating more of the pie just for the crust. I do not own a mixer or a pastery cutter so I used my hands. It worked out perfect. The pie sat for a day before we could finally eat it (made for a family get together) and the crust was perfect. I was very pleased to find out that the bottom was not soggy at all (Sour Apple Tart Cherry Pie). Everytime I bought a role of pie dough for an apple pie the bottom came out soggy. I will never buy pie dough ever again! This is what I will use from now on!
Posted by: Heather on November 28, 2009 9:38 PM
Well I just made this today like right now 7:13p.m on Dec.12, 09 and mine was a struggle at first to do but then I got the hang of it and it came out way better then what I thought. I added more water and flour then the recipe and it came out perfect to me. I am only 15 years old I want to be a Pastry Chef and go to college and everything so I am always practicing on desserts. So this crust was easy for me. I am making a Lemon Blueberry Pie and I was making the crust tonight storing it in the fridge and doing the rest of the pie tomorrow. So I hope this works for everyone else. I was also looking for recipes for pie crust with having to use shortening.
I have tried & failed so many times to make delicate, flaky pie crust like my mother's using her recipe & instructions & techniques. She used a bowl & pastry cutter & her hands. So I've decided to go ahead & get a food processor and try it this way (no doubt will use the food processor for many other things as well). My question is, what size should I get? I can't afford an expensive one, and have looked at a 4C Cuisinart & a 10C Hamilton Beach, both of which have good reviews.
I'm using what I hope is a reasonably standard crust recipe of 2.5 cups flour, 2 sticks of butter, a bit of salt and sugar. I am pre-baking the bottom crust for 20 minutes in my oven at 350 until it is golden brown. using rice and foil for weighting and letting cool for 30 minutes. The bottom crust is about the same thickness as the top crust. From here, a blueberry reduction with 2 cups blueberries, 1 cup sugar, 1 cup water, dash of cinnamon and nutmeg is added along with the top crust. I baked at 350 for one hour...
you'll see it calls for 6 cups of blueberries and only 1 Tbsp of liquid (lemon juice). No added water. It also includes 1/4 cup of flour as a thickener. ~Elise
This is the best pie crust I have ever made or tasted. Thank you sooo much. I have tried to make a good crust but it was always too tough, too thin. Just was not good. Now I can make all the pies I want with fruit in season. All I got to say is follow the recipe to the letter, you will come out a winner.
Thank you sooo much for this recipe. I have always used the store bought crusts because I listened to negative people around me saying it's so much easier just to buy them. Yesterday I decided that I would try for the first time to make my own using this recipe. Needless to say I WILL NOT buy another crust ever!! And it wasn't hard at all. Beginner's luck you might say? I don't think so. It's all in this recipe if you just follow it.
The all butter crust for sweet and savory foods was FANTASTIC! It's the first time I have ever successfully make a pie crust! Perfect! Thank you!
Instead of sugar, I added a packet of Wisdom Natural, SweetLeaf, SteviaPlus but next time I'm going to omit it cause it really didn't make a difference.
and the bit that says "1 1/2 teaspoons stevia extract powder", well I used 5 packets of stevia so that's about a teaspoon more than the recipe calls for. I also added some vanilla. It came out really good!
Some pie fillings cook down a lot, apple pie for instance. What you can do with apple pie is pre-cook the apple slices a bit first, so they release some of their moisture and shrink a bit. You can also make a
The frozen butter and ice water aspect are essential for a great crust, don't disregard this. Two new tips for everyone. I use a spray bottle with ice water when adding to the dough. The spray allows better distribution of the water and helps avoid over-kneading. Also, take bags of frozen veggies, potatoes, or anything you have frozen in a bag (ice) and lay that on the counter surface for a few minutes before you roll your dough. This will help keep the dough ice cold as you roll.
The only way to fix the soggy-bottomed crust problem is to cook your pie for the first 15 minutes at an additional 50 degrees F of heat (this rule is for custard pies). As this recipe calls for 375, you cook it at 425 for the first 15 mins, then turn it down. For fruit pies, use an additional 100 degrees of heat for that 15 mins.
My daughter and I made 24 pie crusts in three hours. My recipe is similar to all of the above. One also mentioned rolling a single pie crust dough in a plastic bag. I came across this idea last year and it should win a Noble Peace Prize in the Humanities category. There is no worse frustration for superwoman of today, than reworking piecrust dough that rips,tears, mishapened and time consuming. Few additional advice, the addition of a tablespoon of vinegar or lemon juice to a cup of water with crushed iced can be used sparingly to the point that if the dough holds together when you pinch it that is enough . No need to form ball. Put mixture in a gallon size freezer bag,flatten out dough with hand at the same time removing any air. With rolling pin, spread to all the four edges until dough thickness is even. The bag helps contain the mixture and the dough easily holds together. There is where the key to tender and flaky lies. No reworking the dough. No additional flour used to roll out dough! You still will see your butter. Zip up the closure, and place in refrigerator or freezer until you use it. If frozen, thaw just until maleable. If the dough cracked with handling when frozen, just press edges together. The best is that no mess!
Open the zipper and cut the sides and bottom of the plastic bag. Remove the top plastic layer. Place your pie pan over the square of dough, and you will notice it is just about the same diameter, but you have the extra four corners. Invert the pan along with the plastic side to support the dough. Remove the plastic and now your dough is in your pan. Shape into mold of pan, using the corner dough to work along the top edge for your flute or sparse areas. Refrigerate prepared pie dough pan for ten minutes, then proceed. This dough when baked is so flaky it results in a crust twice the thickness you rolled it out as! If you need a different shape, just roll several squares to desired dimensions between two lightly floured pieces of parchment paper. My only concern is to figure out how to actually make and bake 24 pies by Thanksgiving. Twelve pumpkin and twelve pecan. The cost of ingredients alone was $150.00. I think I will have to premake and bake the pumpkin pies. I have double ovens. Has any have any experience with making both type of pies ahead of time, thus having to freeze them so they won't spoil? Please share your ideas! For example, can you make the pecan and pumpkin filling and refrigerate. Then put together and place the pecans and bake,etc. Or does freezing effect the taste? Happy Thanksgiving!
Hello Brenda, one suggestion I've received for soggy crusts is to preheat a baking sheet in the oven and then place the pie pan on the baking sheet once the oven is hot. ~Elise
I have to make pie crusts about 5 days before filling and baking.
I want to make Pecan Pie with a homemade crust. Any suggestions on which pie crust recipe. Thanks
I was so glad to come across your comments- I used to make a lot of pie. Traditionally, I used a mix of crisco and butter or just crisco. I haven't been baking much lately, but set out to make a pie last night, with crisco for my husband who is lactose intolerant. The first batch of crust (using butter flavored crisco) was a disaster. The second (using regular crisco) was a little better. I managed to get it into the pan by pressing, but it just crumbles apart.
Does anyone know if the problem is ok if you use a mix of butter and crisco? Or am I stuck with butter only crusts? (In the past, I found that the combination worked better than pure butter.)
What do you think about infusing espresso into the pie crust? I would replace the water with it. I'm thinking so long as it is still ice cold, it shouldn't make a difference?
Espresso is bitter. I'm guessing it wouldn't work so well added to the dough, but who knows? If you try it, please let us know how it works out for you. ~Elise
I used this recipe to make my first pie crust! I made an apple crumb pie on Sunday as a test run for the pie I will be making for Thanksgiving. I brought it to work so that I wouldn't eat the whole thing myself, lol, and it was a roaring success! I think I could have left the pie in just another 5 minutes or so because the crust seemed just a tad underdone, but it was flaky and buttery and delicious! Last night, I made the dough and refrigerated it so I can make the pie tonight for tomorrow's Thanksgiving dinner. The first time I made the crust, I had trouble keeping it together when I tried to form the disk, even though the dough formed when I pinched it. So, I added ice water as I brought it together. The same thing seemed to happen last night only it seemed a little worse than the first time. I plan on rolling the dough out tonight to make the pie. What do you suggest? Do I add water and need the dough a little tonight before rolling it out or should I just make a new crust? Your advice is very much appreciated!
If you are having a hard time holding it together, you might add just a little water to the dough. I have found that even if the dough cracks as I roll it out, I can easily pinch the cracks together. It's not neat and pretty, but as long as you can see lots of dots of butter in the dough you roll out you should have a flakey crust. ~Elise
Hi George, it's a good idea to use unsalted butter in cooking or baking so that you can more precisely measure exactly how much added salt you want to put into a dish. You should pretty much assume that any recipe calling for butter means unsalted butter for this reason. If you do use salted butter in a recipe, you will want to reduce the amount of added salt that recipe calls for. ~Elise
The reason why you use unsalted butter instead of regular butter is simple. Regular butter makes the pie crust too salty. You can always substitute half of the salted butter with half shortening to reduce the salt content and make the crust fluffier.
The butter pie crust recipe is flakey and delicious! The instruction is very clear, the photos are such a bonus, and the tip on pre-freezing cubes of butter makes so much sense!
I ran out of flour so I substituted 1/2 a cup with bisquick and it worked out really great. the texture was awesome and the flavor was great. It was very buttery and flakey. I'm going to make it that way on purpose from now on.
After reading several posts, I couldn't help myself from posting my own....I had never made a pie from scratch. I had thought I had all the ingredients cornered until the wife came home and told me that the all-purpose flour I thought I used was actually rice flour. She picked it up a few days earlier for a friend that had a gluten intolerance. Clumsy me, I worked for more than 2 hours on that crust to get it to do what was explained here. After it kept cracking and cracking, I decided it must need more water. That helped, but I couldn't figure a way to get it off the board until I decided to pull the entire board out of the drawer and slide the pie shell onto the pie plate. What an ordeal! After all is said and done, my gluten-free (not intended) Raspberry pie with the egg coating on top was worth the effort. I can see why many people do these posts, especially for baking, because any one little tip could turn out to be the one thing that can make anyone's pie the best you ever tasted. I will try to use the right ingredients next time. :)
I have been using the butter crust recipe for pot pies and it is fantastic! I make mini-pies, hand-pressing the crust into whatever crockery we're using that day: ramekins, coffee mugs (crust on top only), even rice bowls one evening. The remaining dough is usually turned into thumb-print jam cookies or put into the fridge to be used the next evening. To be honest, the first time I use the dough I'm usually throwing together a weekend meal of leftovers and don't let it rest, but the dough works out fine. Thanks Elise!
I use this recipe for all my pies and I love it. I recently made a chicken pot pie using this recipe and ran out of white All-purpose flour so I had to use some whole wheat flour instead. It turned out ok so I made it again and substituted half a cup of white with wheat and really enjoyed the taste.
Thanks sooo much for the all butter crust recipe.I've always wanted to bake a pie but was too intimidated to try. You made it all seem easy and simple.I added more water than you called for but everything seems to be just fine.I just have one question, " when you say knead did you mean as though I was making bread?" I just squeezed my flour mixture together until I had formed the disks.I hope that I won't have any trouble rolling them out .I have 2 disks chilling in the refrigerator and will be baking my pies in the morning:)
You did it right. You should just handle the dough enough so that it just holds together. If you knead it like bread it will become tough. When you take the dough out of the refrigerator, let them sit for 5 to 10 minutes at room temp, enough time for them to soften just enough to make it easy to roll out. When you do roll them out, you should see splotches of butter throughout the dough crust. ~Elise
Awww yeah! Made the cherry pie using the almond crust - first attempt ever at making a pie or making pastry from scratch. I wasn't able to make the lattice as the almond crust seemed to break apart very easily (probably my bad for not refridgerating and / or too much flour), HOWEVER, I managed to get creative with a star shaped cookie cutter and it looked and tasted AWESOME! Took it in to work at 8:30 and it was gone by 9:00. Some comments from the people who ate it included:
You make a good slice of pie mate - compliments to the chef!
So... 5 stars and thanks! Adding this one to my permanent collection of recipes. :)
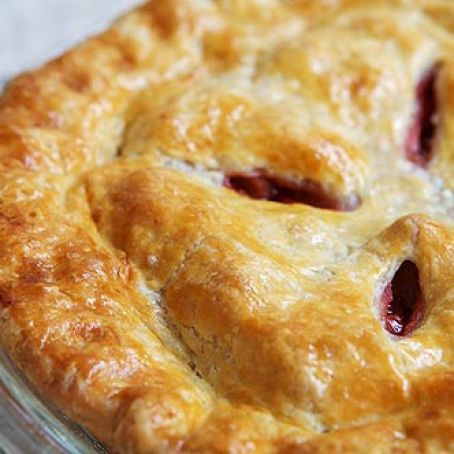
Please-- Which of the crusts described is the crust pictured? I want to make THAT one. *drool*
This is so good! I am not a baker by any means and I made my very first pie and crust with this recipe yesterday. I thought I had ruined it because my food processor wasn't working properly so I cut up the butter with a fork in the flour mixture and it worked out just fine. If you have a butter cutter I imagine that would work too, I plan on trying that next time. My crust placement was a little sloppy and it still baked up perfectly - wouldn't change a thing.
My mom made superb pie crusts using lard or lard and butter mixed. She could whip then out in a jiffy, don't remember her chilling the dough, but they always turned out flaky and tasty.
You don't have to refrigerate the dough, though doing so should make it easier for the dough to hold together and to roll out. So, if you are not having any issues by skipping that step, go for it! ~Elise
Wow, thanks for the recipes and comments. I've used store bought pie crusts in the past because I couldn't find a good recipe with extra information. One thing I didn't see addressed was how to keep a pie crust from sticking to the pie dish. I've had this happen so many times (fruit and pecan fillings), that I stopping making pies. I use glass pie dishes after learning the metal pans aren't really good for great pies.
Help! I'm not sure if I didn't have enough water or there was another problem, but my dough ended up in the trash. Mine looked sort of crumbly (as in your left picture at the top), but not terrible. I was able to form the discs, that looked very similar to yours. After refrigerating for about 2 hours, I tried rolling it out and the edge all the way around was cracking terribly, the dough stuck to a floured surface and the floured rolling pin. The cracks got worse, traveling further into the dough. I thought I followed the directions carefully, but I didn't have success this time around and had to use (shudder the thought) store bought pie dough. I was really hoping not to have to do that any longer.
Hi Shari, sounds like either a) you could have used a bit more water, or b) you could have let the dough sit a little longer at room temp before rolling it out. If it cracks like that, you can just shmoosh it together with your fingers. You don't need to throw it out! At a minimum, if a pie crust is simply too messy, you can always use the dough to make
. These days I pretty much make only the all butter crust (though I would like to try my hand at a crust made with lard). The Crisco I used for the recipe that calls for shortening was a trans-fat free Crisco. Not flavored. ~Elise
You should be using unsalted butter. If you are using salted butter, you should not add any salt to the dough. ~Elise
Then you can use a pastry cutter, or two dinner knives that you use to cut through the mixture like scissors. Or you can do what I do when I don't have a food processor, use my fingers to shmush the butter pieces into the flour, and then use my fingers again when adding water. ~Elise
I had actually used your recipe verbatim and ruined it prior to getting it right. I think my problem was that I was too hesitant with the water and so I did not add enough. I only added 5 tbsp because I didn't want it to get tough.
For those who have a problem with their crust falling apart while rolling it out, I've found that this little trick helps me enormously: I simply roll out my crust between two pieces of plastic wrap. No need to add extra flour, which can further dry out the dough. At first, you will need to keep adjusting the plastic, but as the dough begins to flatten, it's a breeze. You can refrigerate your rolled crusts while you make the filling (they're already wrapped in plastic!) and transfer them easily to a pie pan when you're ready to assemble. I use only whole wheat pastry flour and butter,(a finicky combination) but this trick gives me beautiful whole grain pie crusts that don't fall apart and are tender and flaky every time.
I've seen a few people mention that when they made it into disks that it seemed too dry. Be patient. While you let the disks chill in the fridge, the water will still be soaking into the flour. Another thing to remember is once the water hits the flour any agitation/mixing makes gluten and that can lead to tough pie dough. So once it clumps up like in the picture, form it into the disk and let it rest. Also, Ive got to say, awesome recipes!
Do you have a website? You can place a link to this page by copying and pasting the code below.
Add to Google Toolbar
How to Make a Lattice Top for a Pie Crust
Review this recipe