 1 Picture
Ingredients
- 2 c. flour
- 1/2 c. salt
- 3/4 c. warm water
- Large bowl
- Mixing spoon
- Baking Sheet
- Rolling pin or solid cup
Details
Preparation time 20mins
Cooking time 60mins
Adapted from mom2mycrazy2.blogspot.com
Preparation
Step 1
Step 1: Mix ingredients together in a bowl. If the dough is a little dry add water a little at a time.
Step 2: Make a ball of dough, then flatten it to about a one-inch thickness in the shape of a circle.
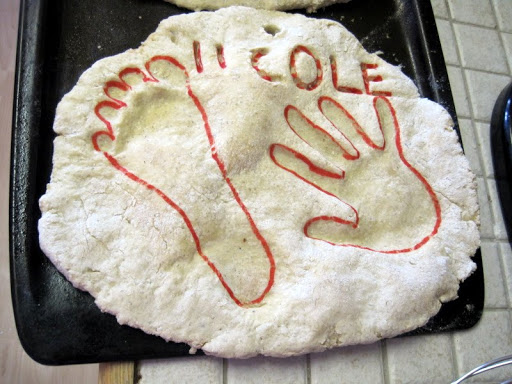
Step 3: Place the dough on a baking sheet, if you have not already. Put the baking sheet on a hard surface like a tile floor or pavement. Press the hand and/or foot into the dough to make an imprint. Press on every toe and finger and made sure their palm/heel got a good push into the dough.
Step 4: If you want to add a name or a date, the easiest way is to use a toothpick and poke words/date in with many little dots. I tried a few different ways (knifes and dragging the toothpick) and it just kept tearing the dough. (see below picture)
Step 5: Bake at 325 degrees in the oven until hard or let it air dry a couple of days. Once baked, it comes off the pan easily. I recommend baking. I baked one of them right away and let the other two air dry. The one I left in the oven I finally took it out after 30 min and let air dry the rest of the way (it probably could have baked another 10-15 min). The other two started to color oddly and stick to the pan while air drying after a couple of days, so I threw them in the oven for 20 minutes to bake. They get brown underneath but not on top and they didn’t stick to the pan once baked.
Step 6: Paint and decorate as you like. I like to let them paint with cue tips, then I do not have to worry about them damaging the few brushes we have while they are painting on this hard surface.
Step 7: Get excited about what you were able to create! **Warning** Mold will break when tossed!
Review this recipe